To be honest, I forget now exactly when I first heard about the Azure Mobile Client library. I do however remember an initial sense of excitement for being able to add Online/Offline syncing to my apps. That excitement gradually faded a little when I started to deep dive into the library and realized that every project I wanted to use the Azure Mobile Client, meant that there were a number of helpers I would need to recreate. If you're familiar with the Azure Mobile Client, the chances are you may have seen tutorial either by or inspired by Adrian Hall's guide. Even Xamarin's "Connect App" template uses this basic approach. Honestly I don't mind providing an implementation for an interface or two in my projects, but it gets a little old when I have to redevelop everything in my projects.
It was for this reason that I decided to wrap the abstractions and some basic implementations into a reusable library. The AzureMobileClient.Helpers library wraps what you need to quickly get off the ground running with the AzureMobileClient. But it's really about more than simply providing the base classes you need to be successful. It's also about helping you to develop the code that follows best practices, and helps keep your code testable.
So what does getting started even look like? Well let's say we have the classic TodoItem.
public class TodoItem : EntityData
{
    public string Name { get; set; }
    public string Notes { get; set; }
    public bool Done { get; set; }
}
We don't need to define any of the fields specific to our Azure Mobile Services Entity as it's already defined in the EntityData base class. Since I'm all about Developer Experiences, and trying to make things to where we have to write as little code as possible to have a fantastic app, I'll use Mobile Center to quickly setup a Mobile Backend.
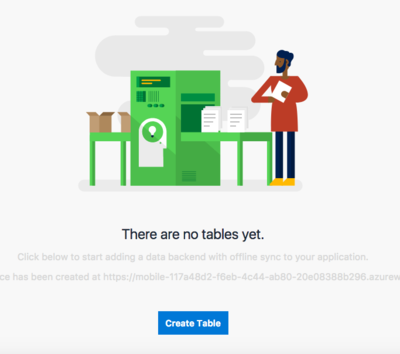
Navigate to the Tables tab and create your first table. Note that when you first go to the Tables tab you'll be asked to link the app to your Azure account. The Mobile Center will automatically go out and provision a new Mobile App Service and setup everything in a Resource Group for your app. You should be aware that you can go into the Azure Portal at any time to manage the resource. When Mobile Center sets everything up it will use a SQLite database which is great for testing, and not so great for Production. If you want to set this up to be more than a demo, before you create your first table go into the Azure Portal and configure either a SQL Server connection or Storage connection under Mobile -> Data Connections. For this example we're not going to set up any authentication, but you can do this easily from Mobile Center. The great thing about Easy Tables is that the data store allows for a dynamic schema so all we need to provide for this is a table name and click Create.

Really with very little effort and Zero code on your part, your mobile backend is ready. Notice I said it's 'Zero code on your part', and not 'Zero code'. Behind the scenes it is setting up a Node.js backend adding the files you need. You can go into the App Service Editor at any time and make manual changes if you need to. All you need to do now is setup your Xamarin application. Keeping things simple let's set up the application using Prism with a NetStandard1.4 Core library so that we can use the latest NetStandard release of the Azure Mobile Client and the Helpers library I mentioned before.
Now in order to keep things a little easier I want to keep a singular app context that I can use so I can easily scale from 1:N models without having to update the dependencies I'm injecting into my ViewModels. To do this I'm going to reference the Container specific implementation for the library so I can more easily set this up. For this we'll use the DryIocCloudAppContext and provide our Tables very much like we would using Entity Framework and the DbContext.
public class AwesomeAppContext : DryIocCloudAppContext
{
    public AwesomeAppContext(IContainer container)
        : base(container, AppSettings.DbName)
    {
    }

    // NOTE: This must be here for the AppContext to pick up your Model Type
    // and ensure that the table is created in the SQLite store
    ICloudSyncTable<TodoItem> TodoItems => SyncTable<TodoItem>();
}
Now, we just need to register our services:
protected override void RegisterTypes()
{
    Container.Register(typeof(ICloudSyncTable<>), typeof(AzureCloudSyncTable<>), reuse: Reuse.Singleton);
    Container.RegisterInstance<IMobileServiceClient>(new MobileServiceClient(AppSettings.BackendUri));
    Container.Register<AwesomeAppContext>(Reuse.Singleton);

    Container.RegisterTypeForNavigation<NavigationPage>();
    Container.RegisterTypeForNavigation<MainPage>();
    Container.RegisterTypeForNavigation<TodoItemDetailPage>();
}
With our services we're all set. We just need to add AwesomeAppContext to the constructor of our ViewModel and we can access our data.
public class MainPageViewModel : BaseViewModel, INavigatedAware
{
    private AwesomeAppContext _context { get; }

    public MainPageViewModel(AwesomeAppContext context)
    {
        _context = context;
        TodoItems = new ObservableRangeCollection<TodoItem>();
    }

    public ObservableRangeCollection<TodoItem> TodoItems { get; }

    public async void OnNavigatedTo(NavigationParameters parameters)
    {
        await _context.TodoItems.SyncAsync();
        TodoItems.ReplaceRange(await _context.TodoItems.ReadAllItemsAsync());
    }
}
Finally we can go from idea to working app in under 10 minutes with full Online/Offline Sync. You can see the full working TodoDemo app on GitHub.